A Complete Guide to the Handin Server
1 Setting up a CCIS account
Go to https://my.khoury.northeastern.edu/account/apply to apply for a CCIS account. Provide your first name, last name, Northeastern email address (the one that ends in @northeastern.edu), and a username.
NOTE! If you are a student who has an older @husky.neu.edu email address, you should use that instead of your @northeastern.edu account.
NOTE! If you have previously used the handin server in another course, then you have already created a Khoury account. If you don’t remember it, you should use the account recovery process instead; you cannot register for a second account.
Check the box that asks if you are enrolled in a CCIS class. Enter your NUID#.
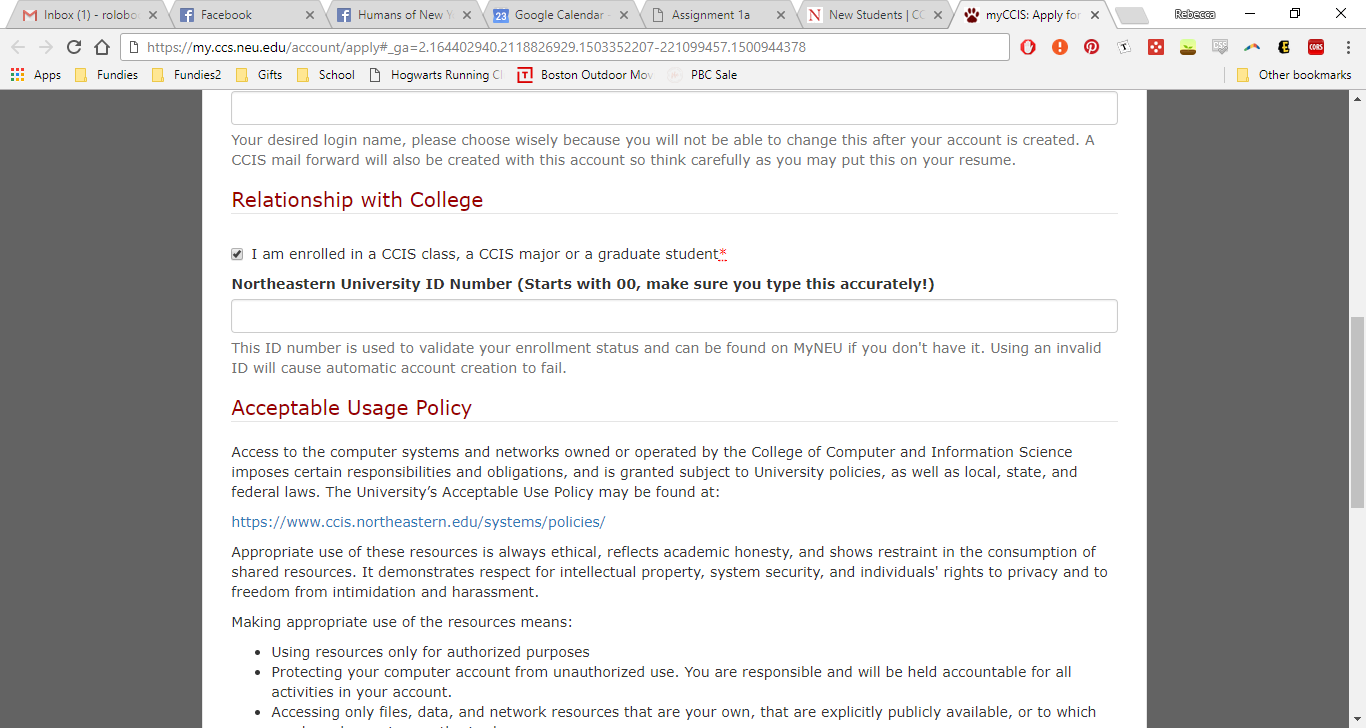
Read the acceptable usage policy and check the box at the bottom that asks if you have read it.
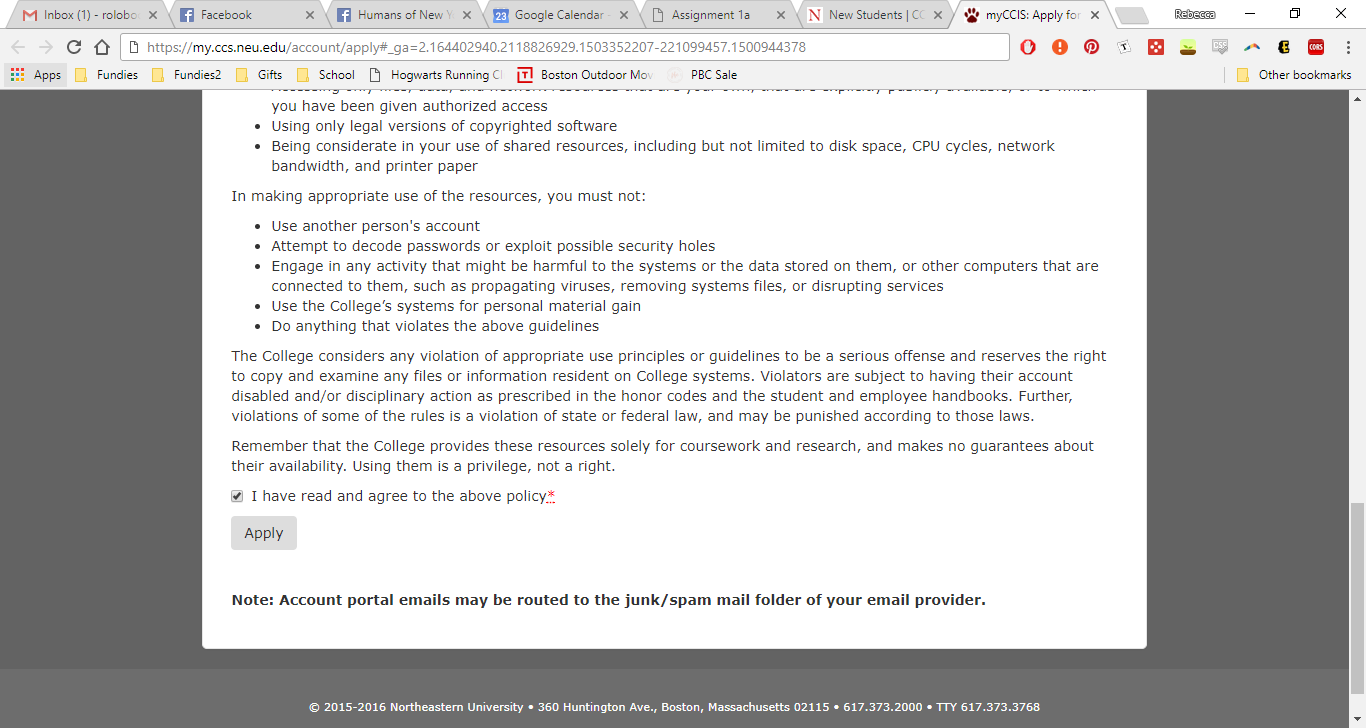
Click the
 button. You will have to wait for an email from systems for the next step. In this email there will be instructions for setting up a password for your account. After you have done that you should be able to use your CCIS credentials.
NOTE! If you get an error message implying that your account cannot be created, you probably have one associated with your NUID already, and you should use account recovery instead.
2 Logging in
Go to https://handins.ccs.neu.edu/ on your web browser. Please note that you cannot use Microsoft Edge or Safari as they are not currently compatible with the handin server. You should see this page:
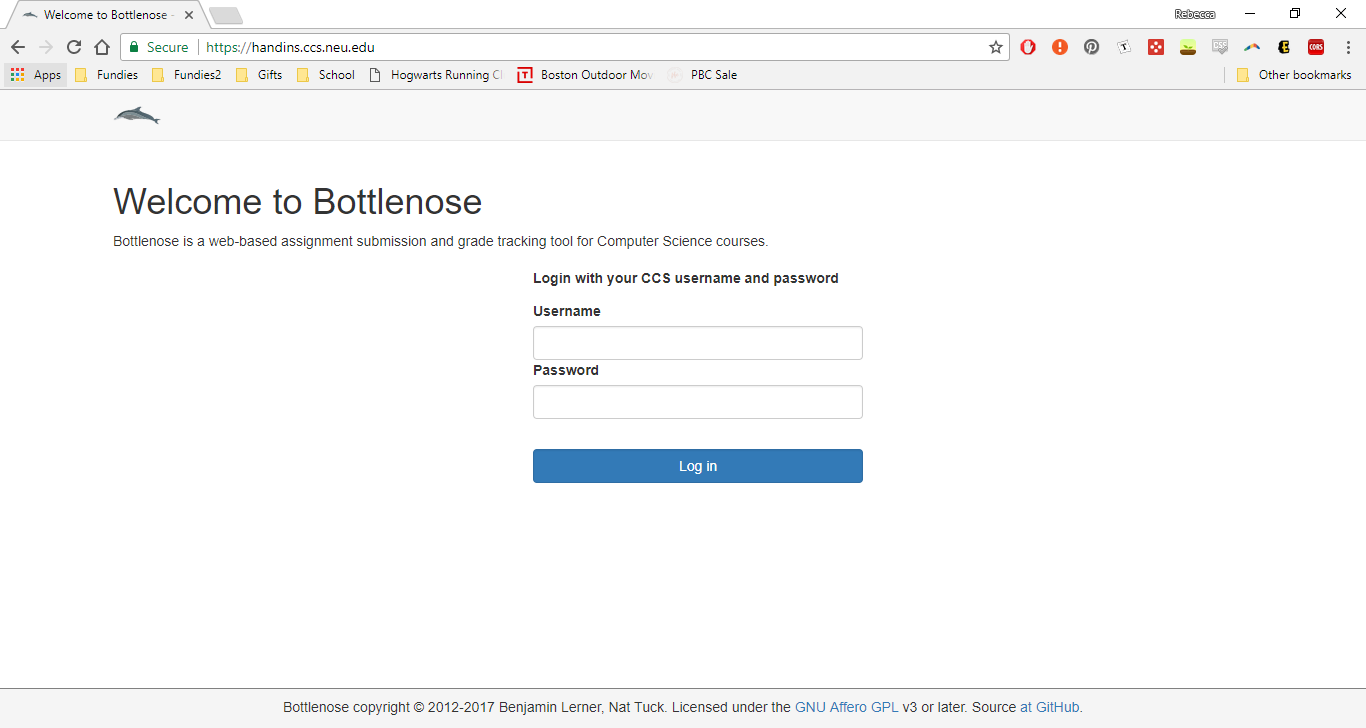
Log in using your CCIS credentials. (If you don’t have CCIS credentials please see Setting up a CCIS account). The first time you log in you should see this page:
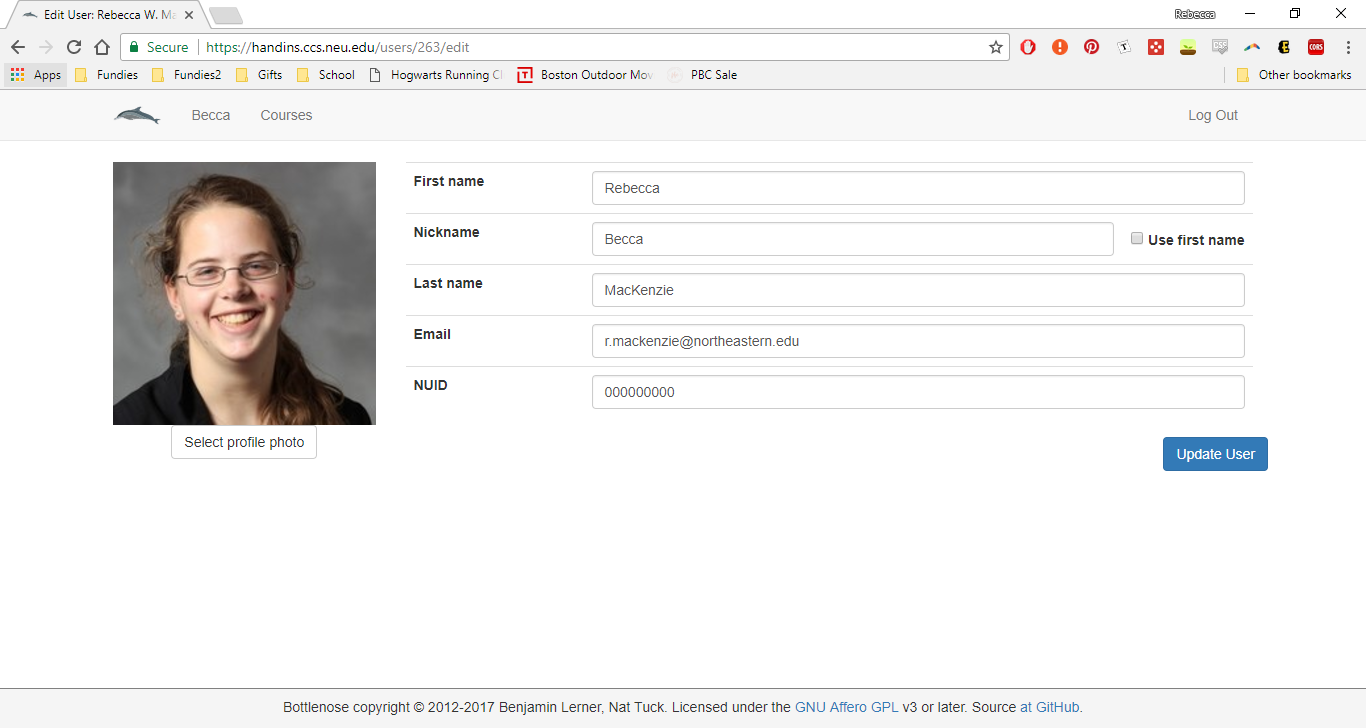
Please provide your first name, your preferred name, your Last name, an email address, your NUID#, and a profile picture. It is very important to provide a recognizable profile picture so we know who you are. Please note that if your profile photo looks odd it is because it has been resized. To fix this please upload a smaller file (less than 200px wide by 300px tall, and less than 50KB in file-size). Click the
 button in the lower right corner of the screen when you are finished. This will take you to the list of courses.
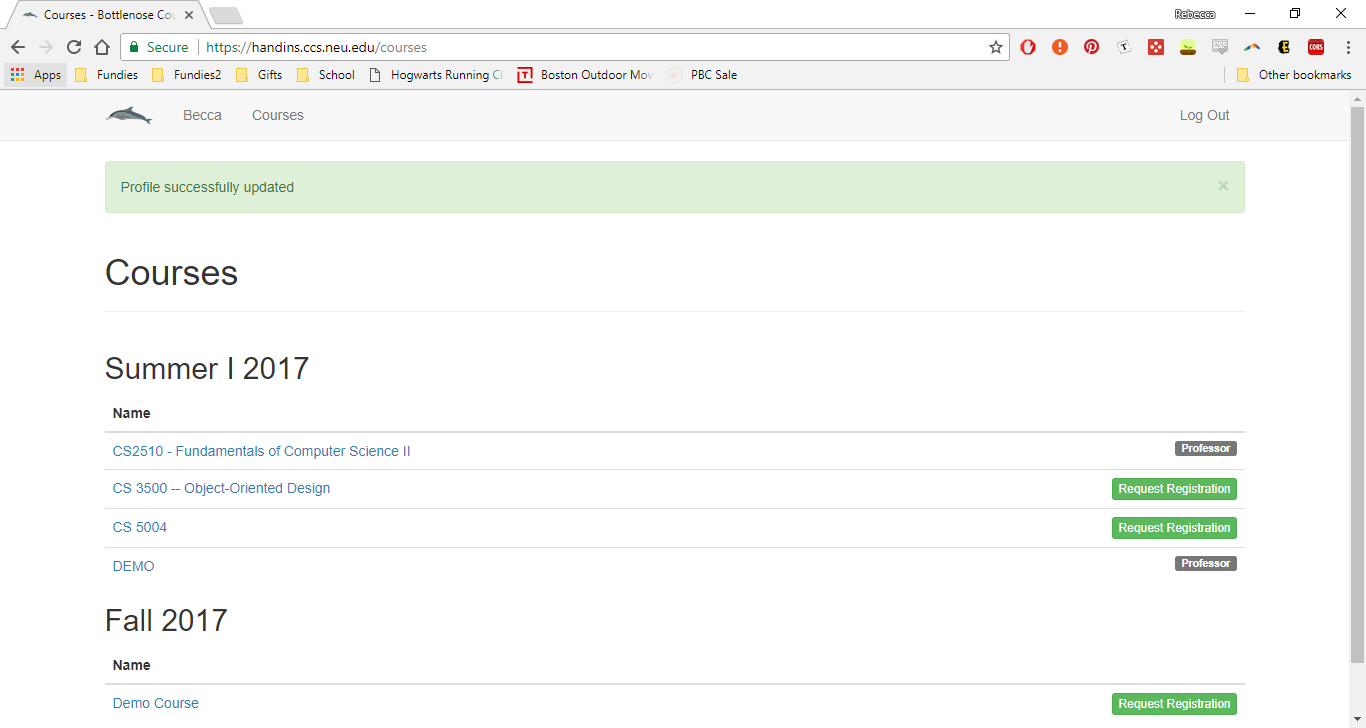
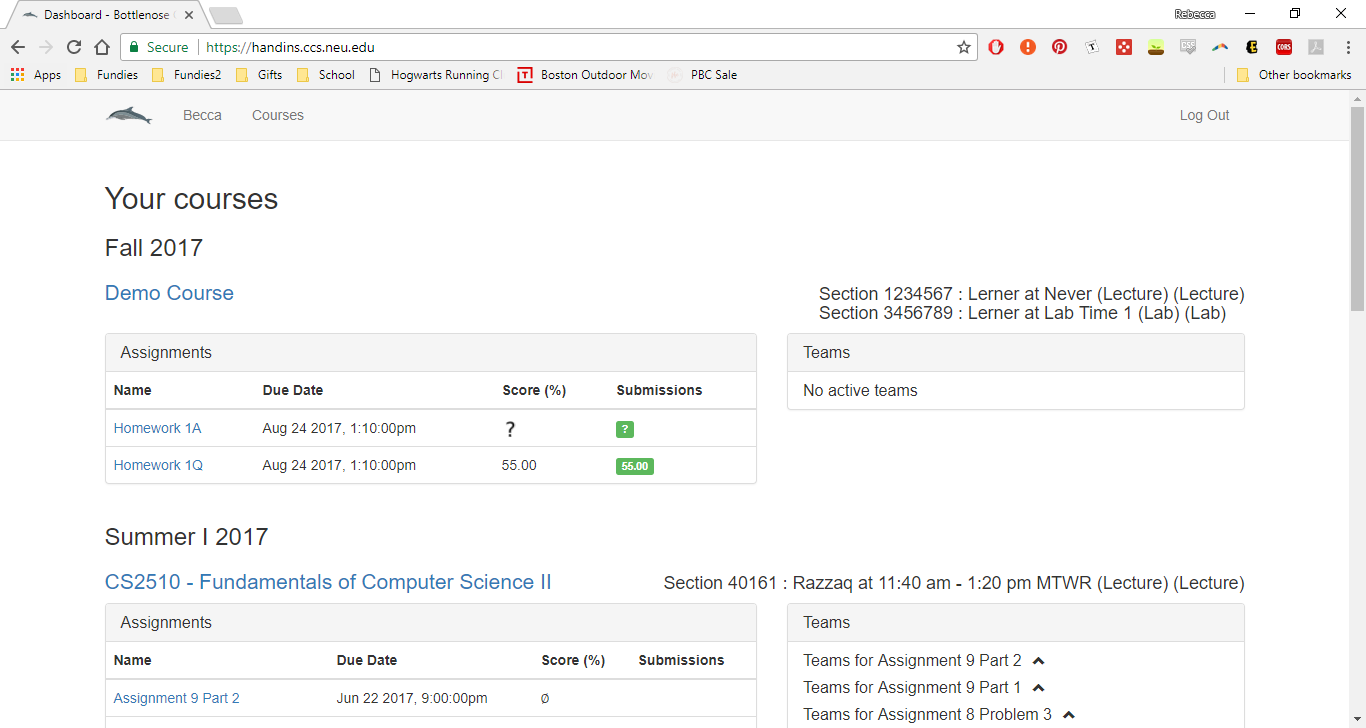
3 The homepage
To go to the homepage click the dolphin at the top of the screen (available from any page):

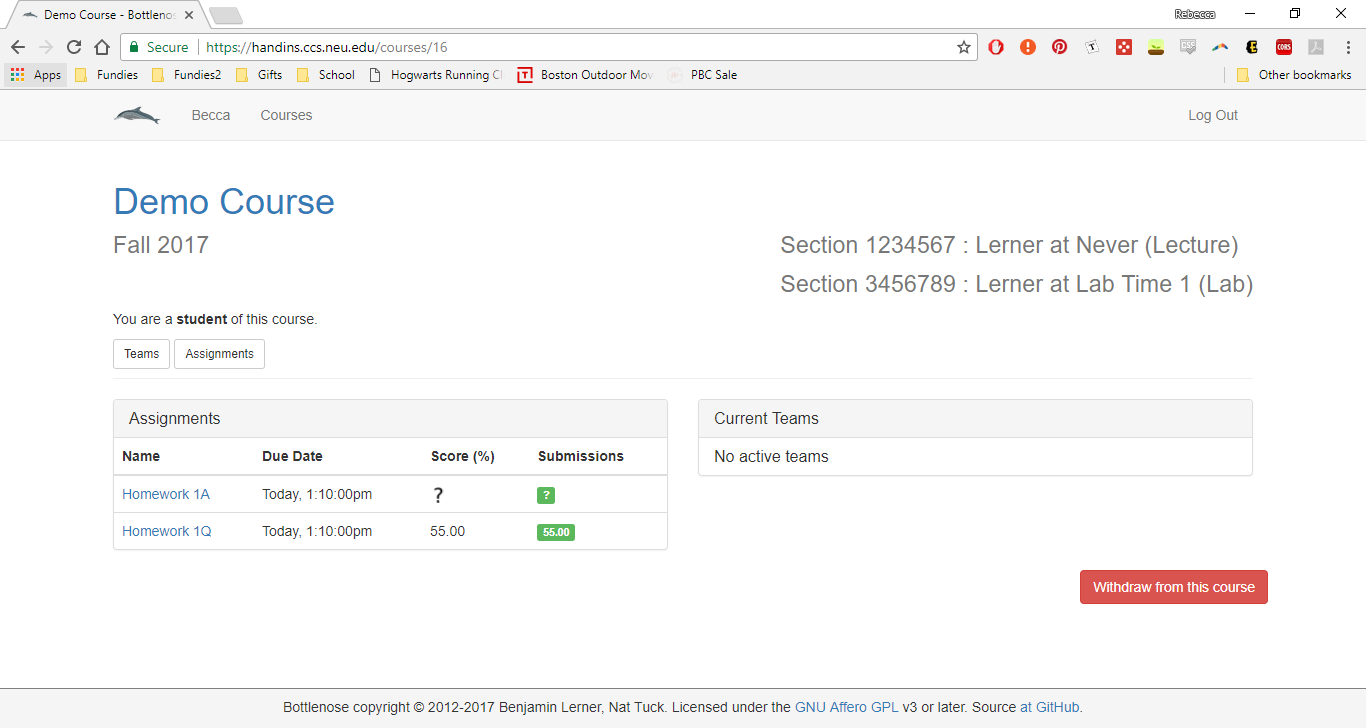
The homepage looks something like the image below. Notice that it gives you a list of the courses you are registered for in each semester as well as the list of assignments for those courses and how you did on them. On the right hand side you will see a “Teams” box which will give you information about any students you are currently partnered with. Right now I have no team so it says “No active teams”.
4 Registering for a course
Go to the Courses page listed in the toolbar. I have starred the link in the image below which also shows what the Courses page looks like.
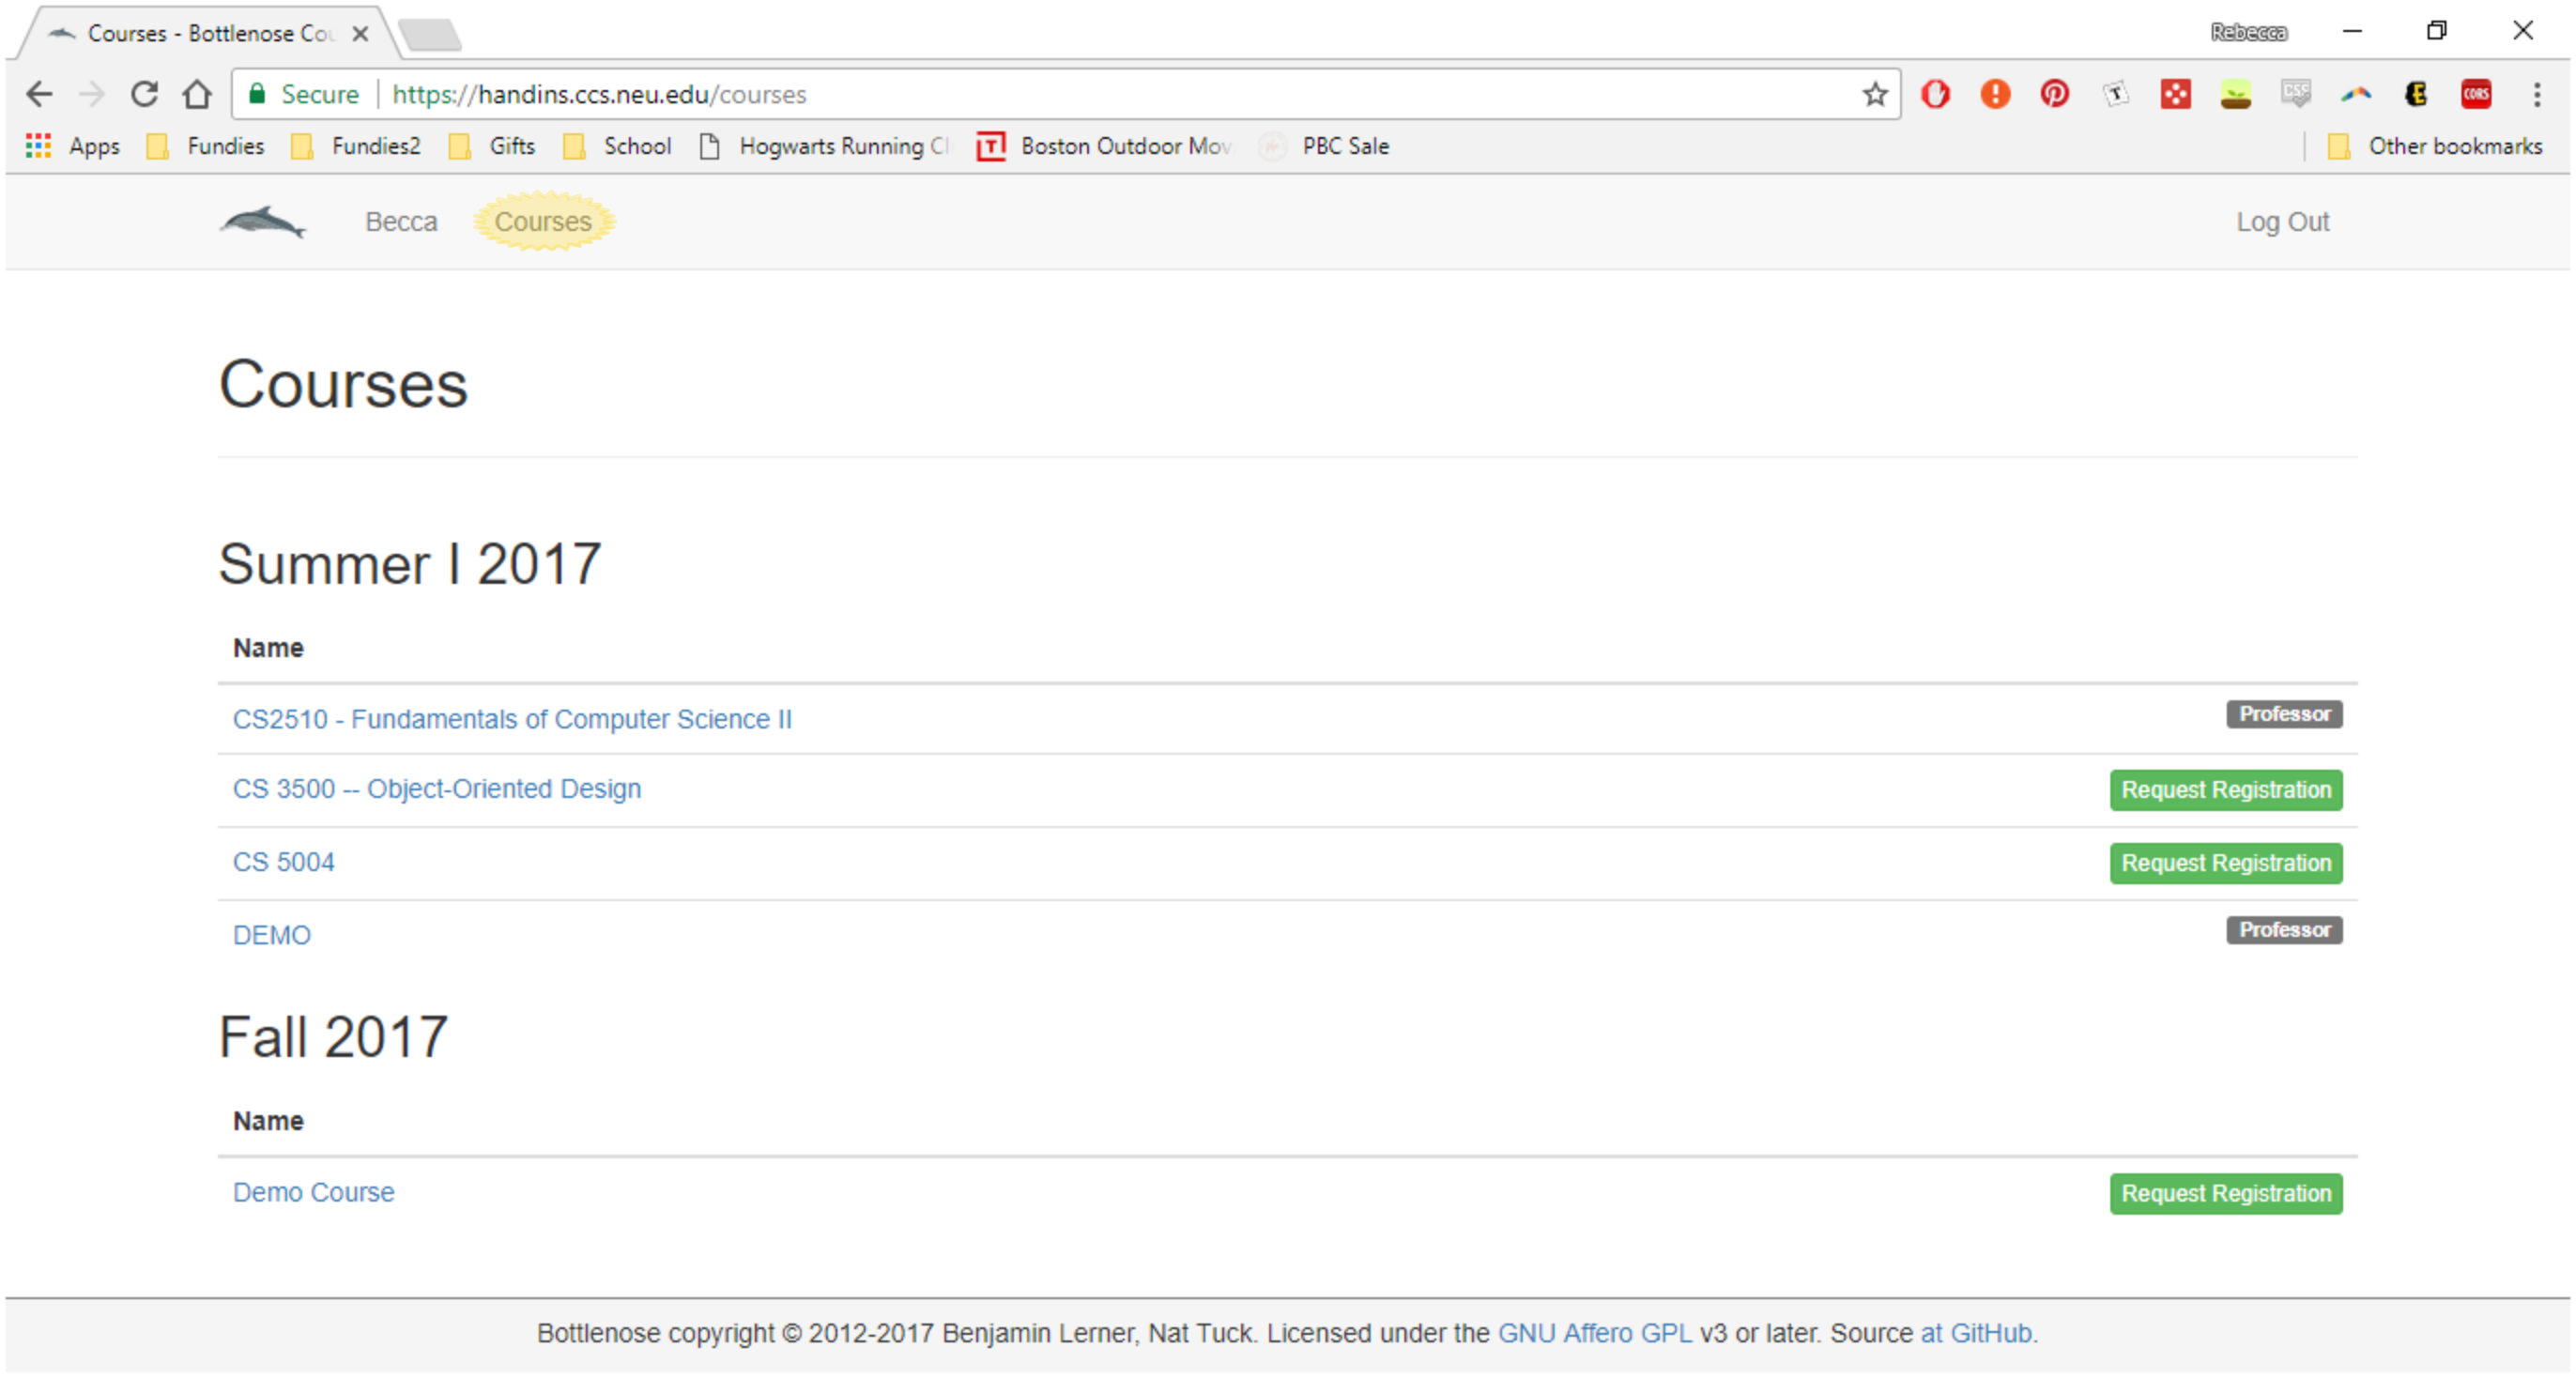
Courses are listed by semester so please ensure you are looking at the right semester since courses often occur for multiple semesters. Next to the course you want to register for (CS2500 in Fall 2017) you should see a
 button. Click this button.
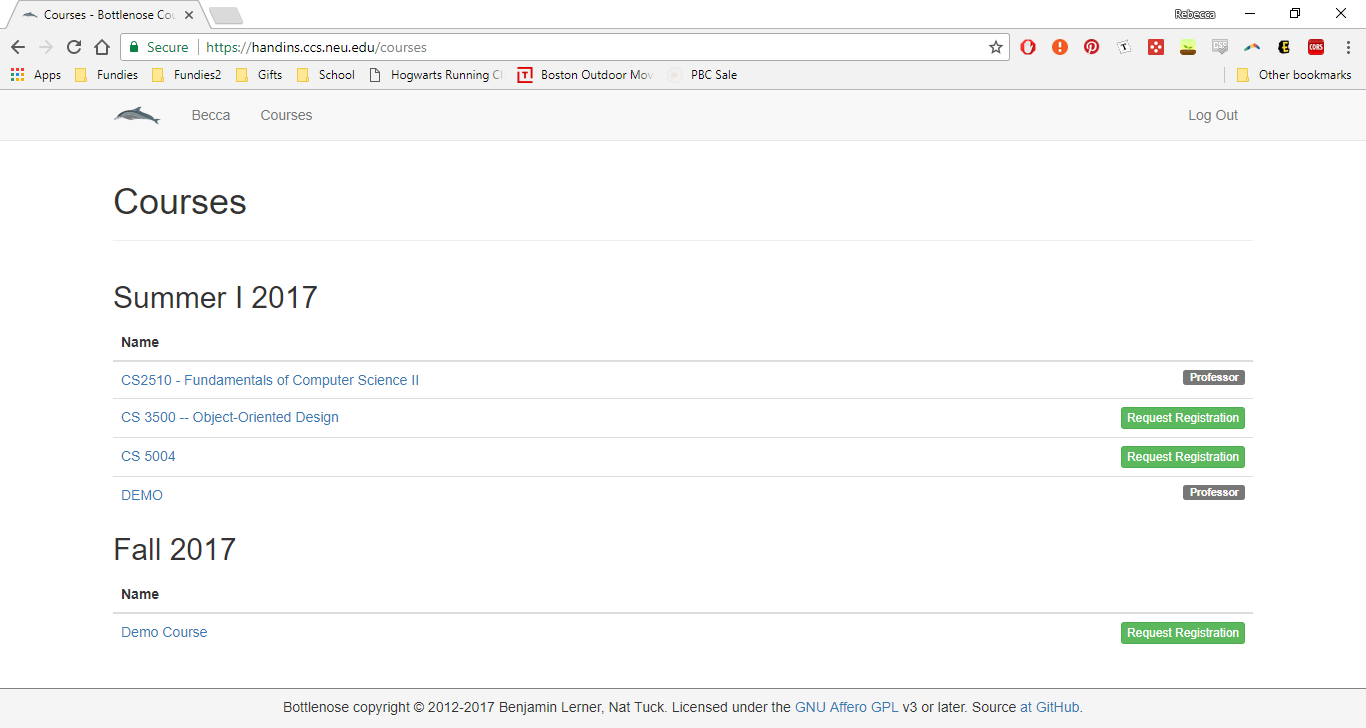
You should see the following page:
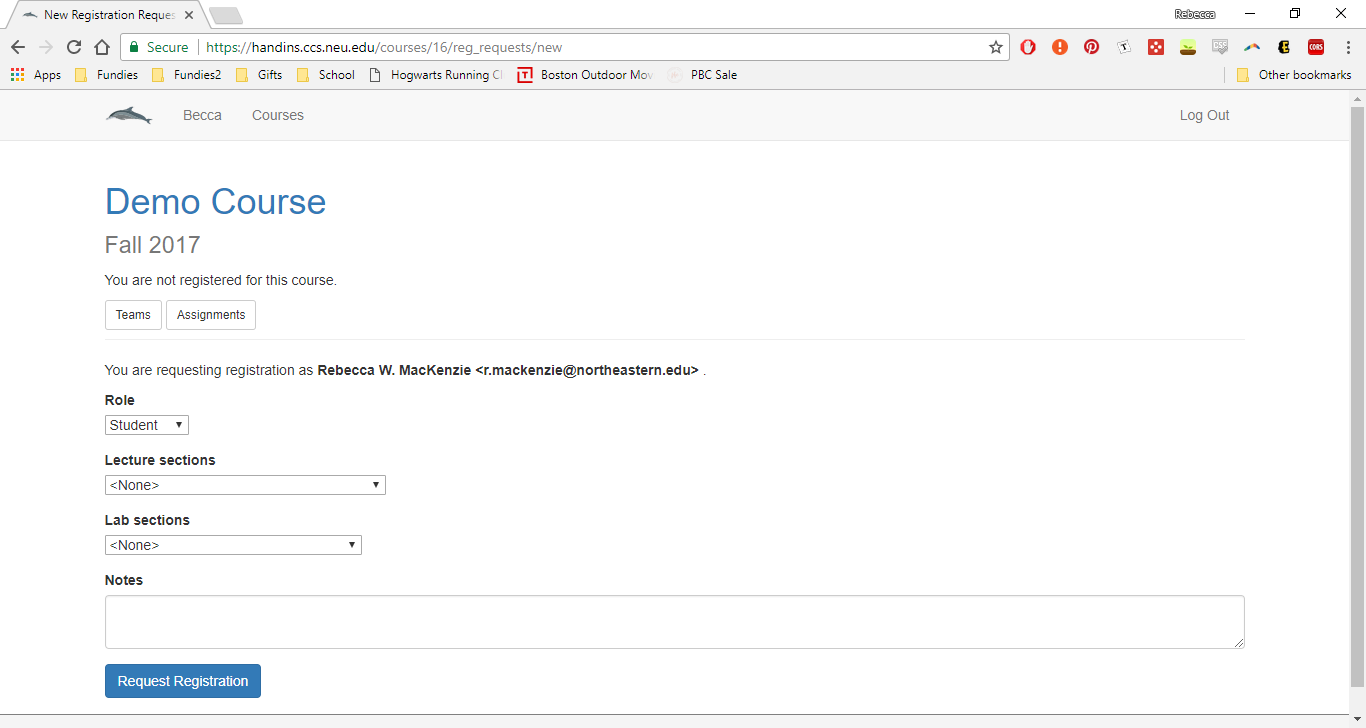
For Role select “Student”. For Lecture sections select the section you are in. Sections are listed by CRN, professor and time. For Lab sections select the lab section you are in. Sections are listed by CRN, professor and time (although the professor tends to be the same for all lab sections). When you are done it should look something like the below image. Click the blue
 button at the bottom of the page.
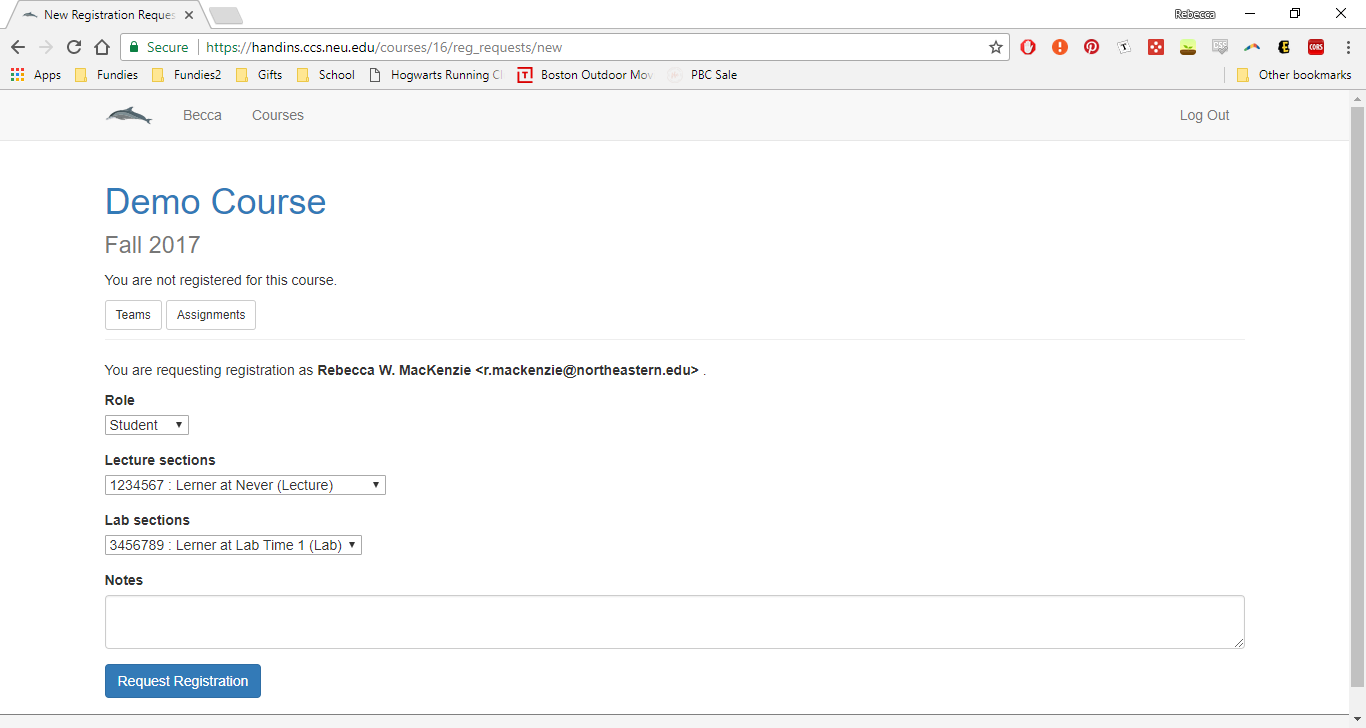
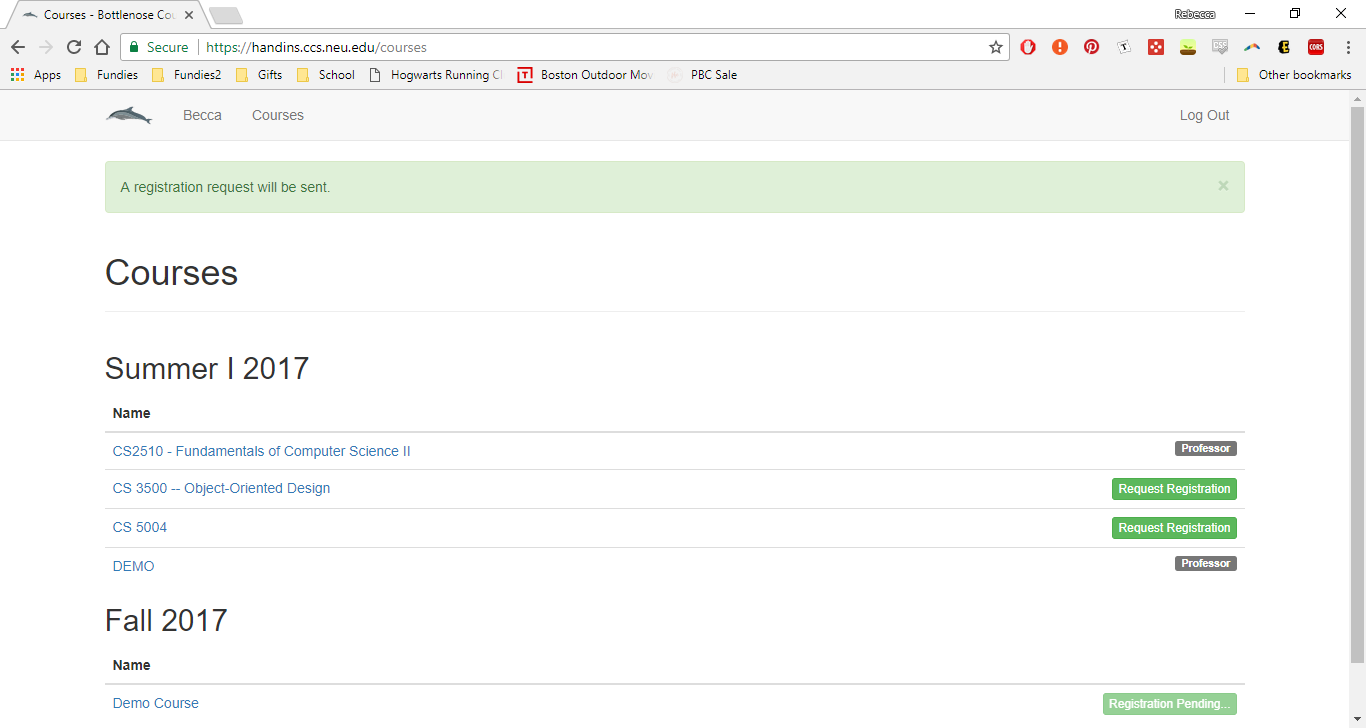
This will bring you back to the Courses page with a message that says “A registration request will be sent.” Next to the course you requested registration for it should say
 .
.
Now you have to wait for the course staff to approve your registration. This should not take more than a day but please be patient with us. Do not post a question on Piazza asking when your registration will be approved. Do not email us asking when your registration will be approved. Once your registration is approved you should see a gray box next to the course that says
 as shown below.
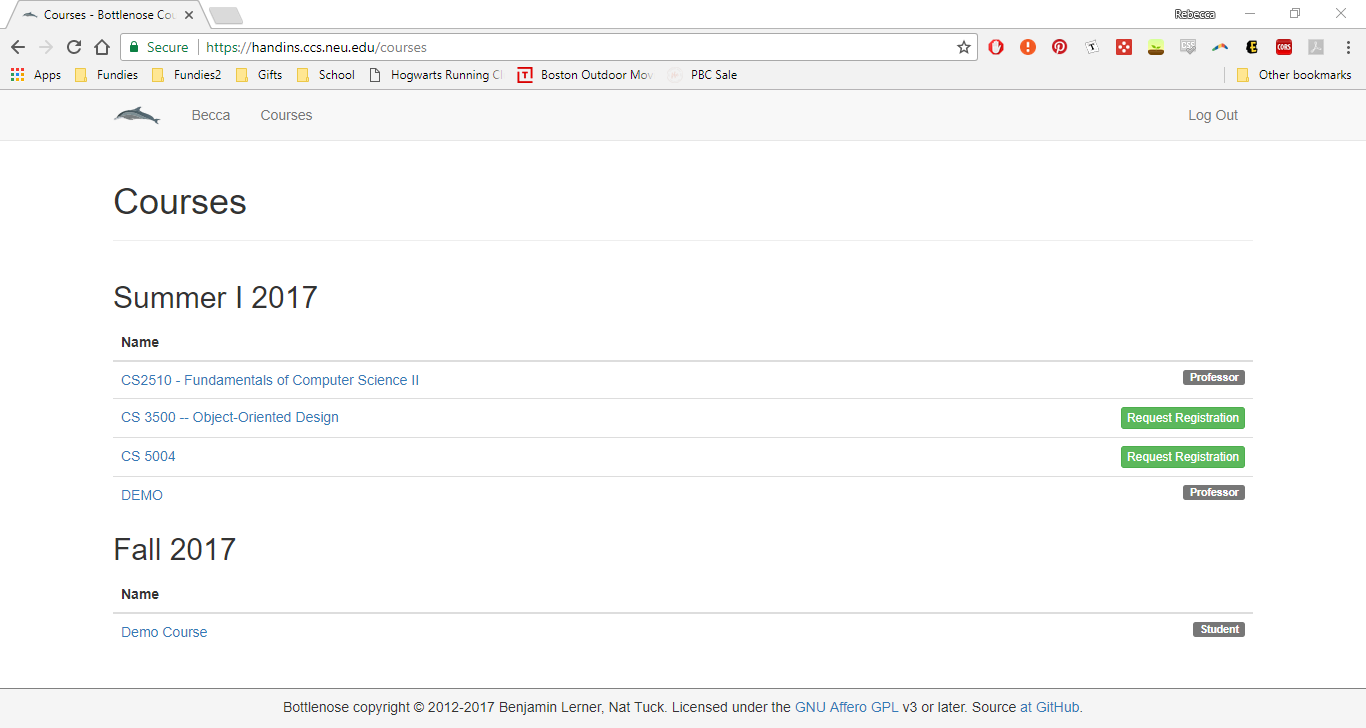
5 Viewing a course’s home page
Go to the Courses page listed in the toolbar. I have starred the link in the image below which also shows what the Courses page looks like.

Click the blue link for the course you want to view the home page for. You will need to be registered for the course first (i.e. there is a gray
 box next to the course) so please ensure you have followed the instructions in Registering for a course before proceeding. You should see a page similar to the following:
6 Requesting teammates
Go to the course home page (see Viewing a course’s home page) and click the
 button at the top of the page.
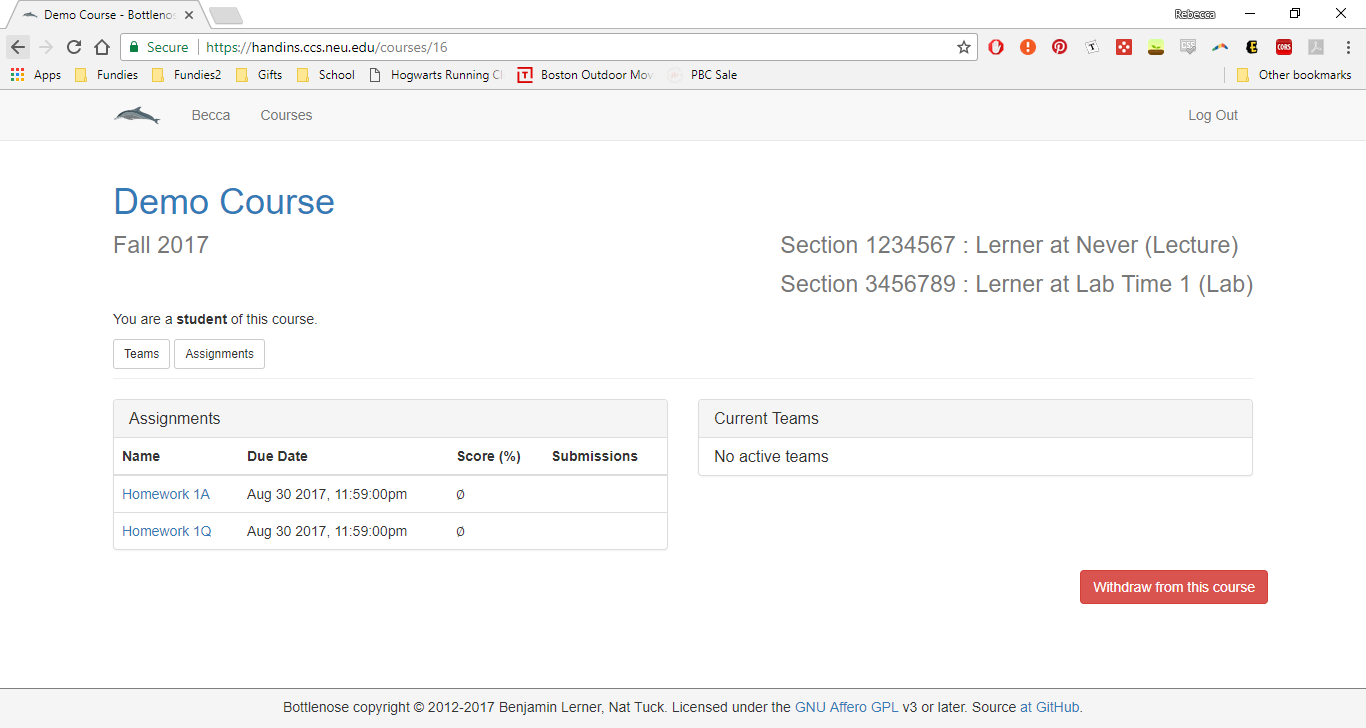
You should see a blue
 button next to any future assignment for which you will need a new team. Click this button to request your teammates.
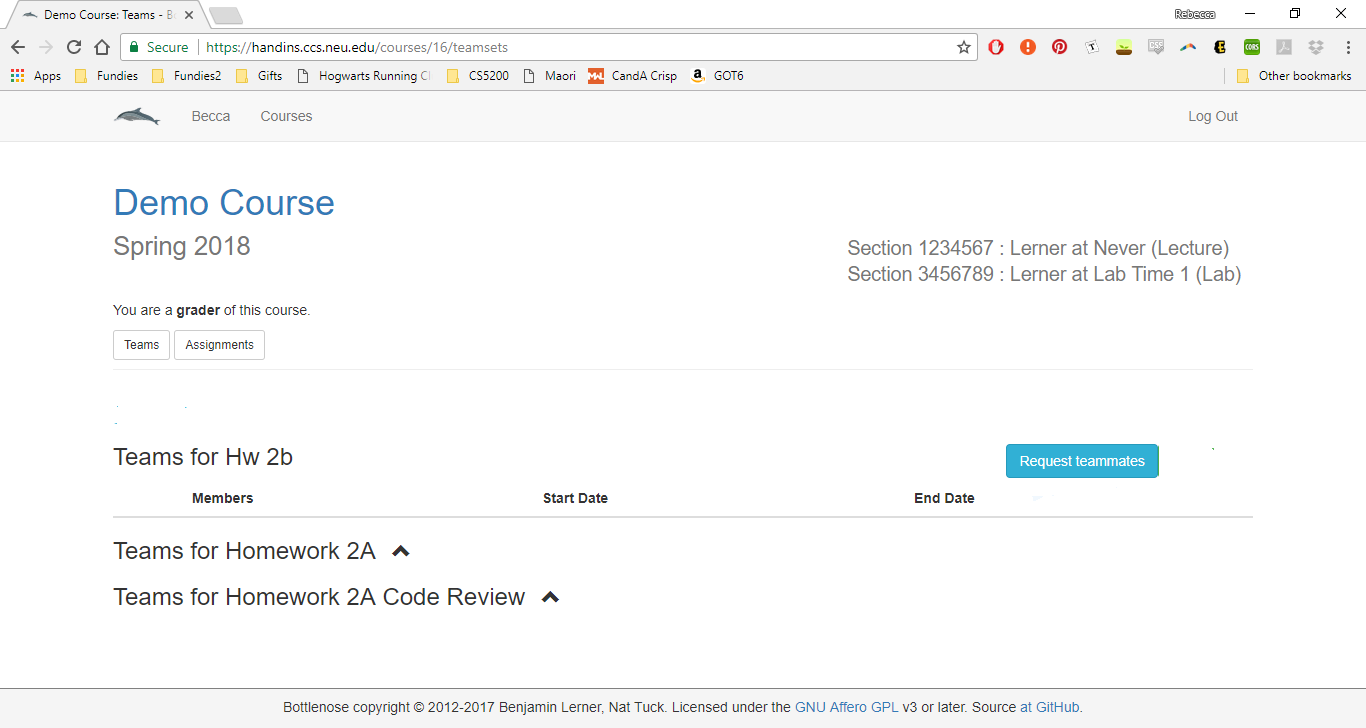
You will be brought to a page where you can view past requests and submit a new request. Enter the CCIS usernames of the students you want to team up with in the text box. Shown below is an example where I am making a request to join a team with user1 and user2. WARNING: If you do not enter the correct usernames you will not be able to complete your request so please be sure you have the usernames spelled correctly before continuing. WARNING: do not enter your own username, or your team request will never succeed.
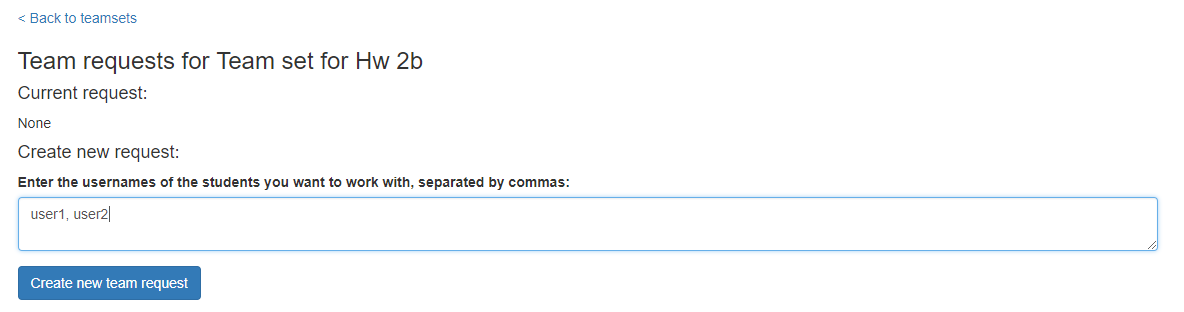
Click the blue
 button to create your request. You should see a success message like the one shown below that says “Your team request has been made”. Your request will now display in the “Current requests” section. You can delete the request by pressing the orange
  button.
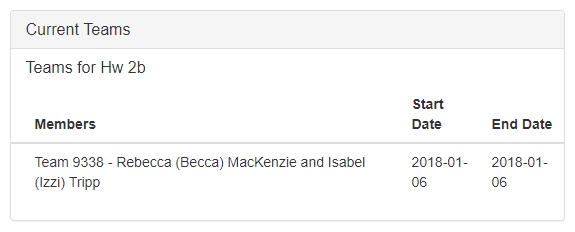
You will now have to wait for your teammates to make a request to partner with you so that the staff can be sure that you have all agreed to work together. When that is done you should see the status change to “Ready”.

You will now have to wait for the staff to approve your request. Once this is done you should see your new team in the “Current teams” section on the course homepage.
7 Submitting a questionnaire
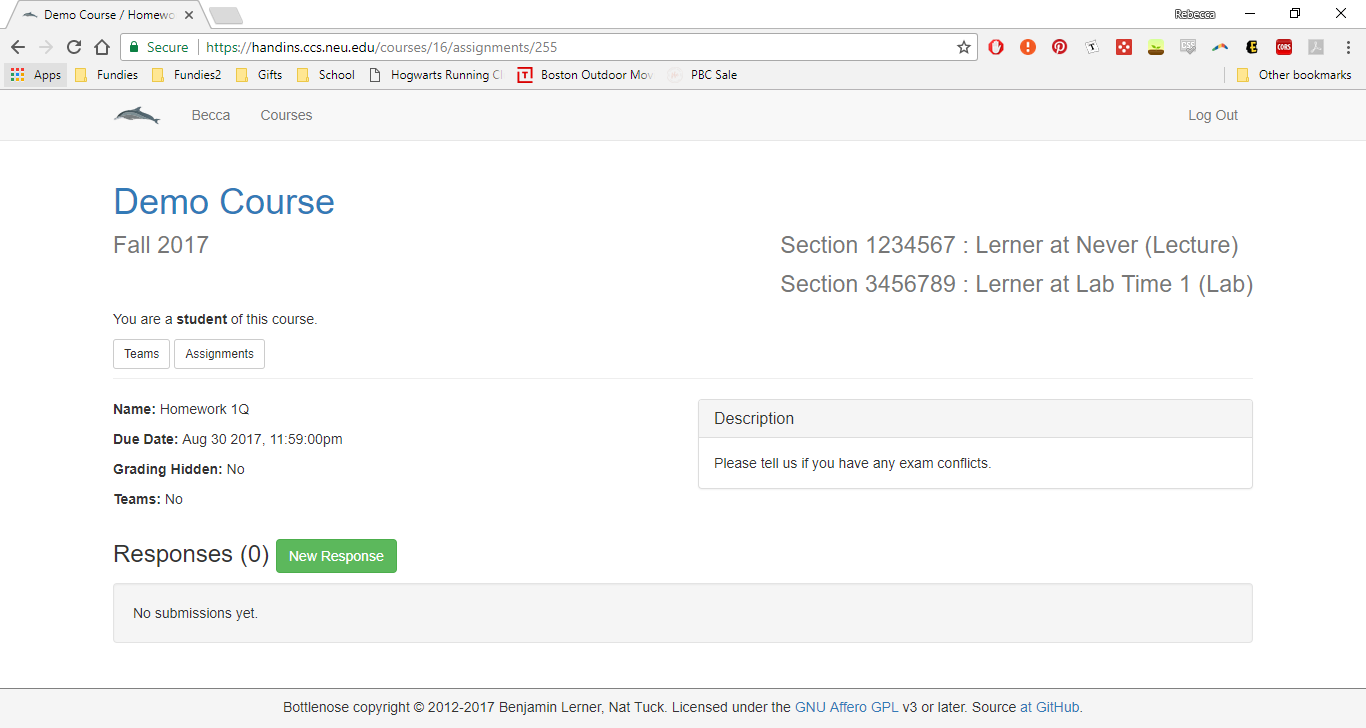
Go to the course home page (see Viewing a course’s home page). Click the blue link for the questionnaire you would like to submit to. In our case I will select Homework 1Q.

Click the
 button to start answering the questions.
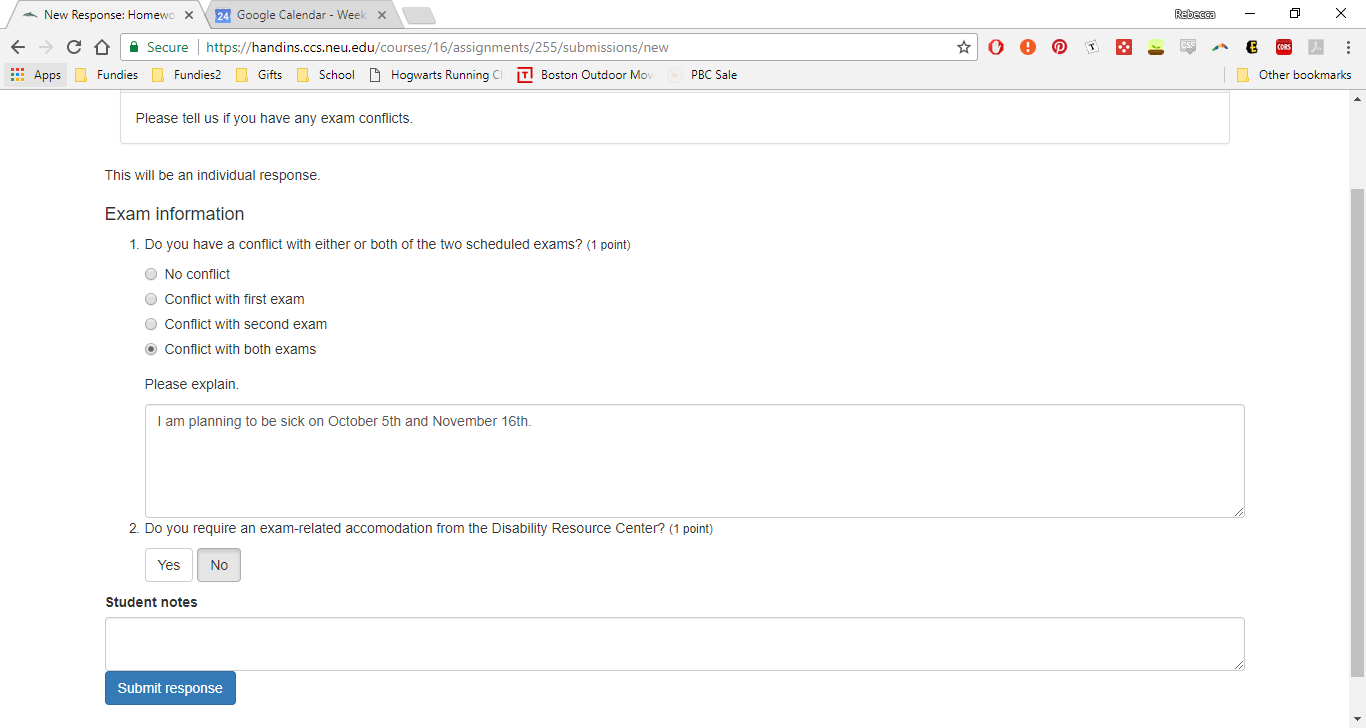
Answer the questions for the assignment and click the
 button at the end.
This will bring you to the page for your submission which should look something like this:
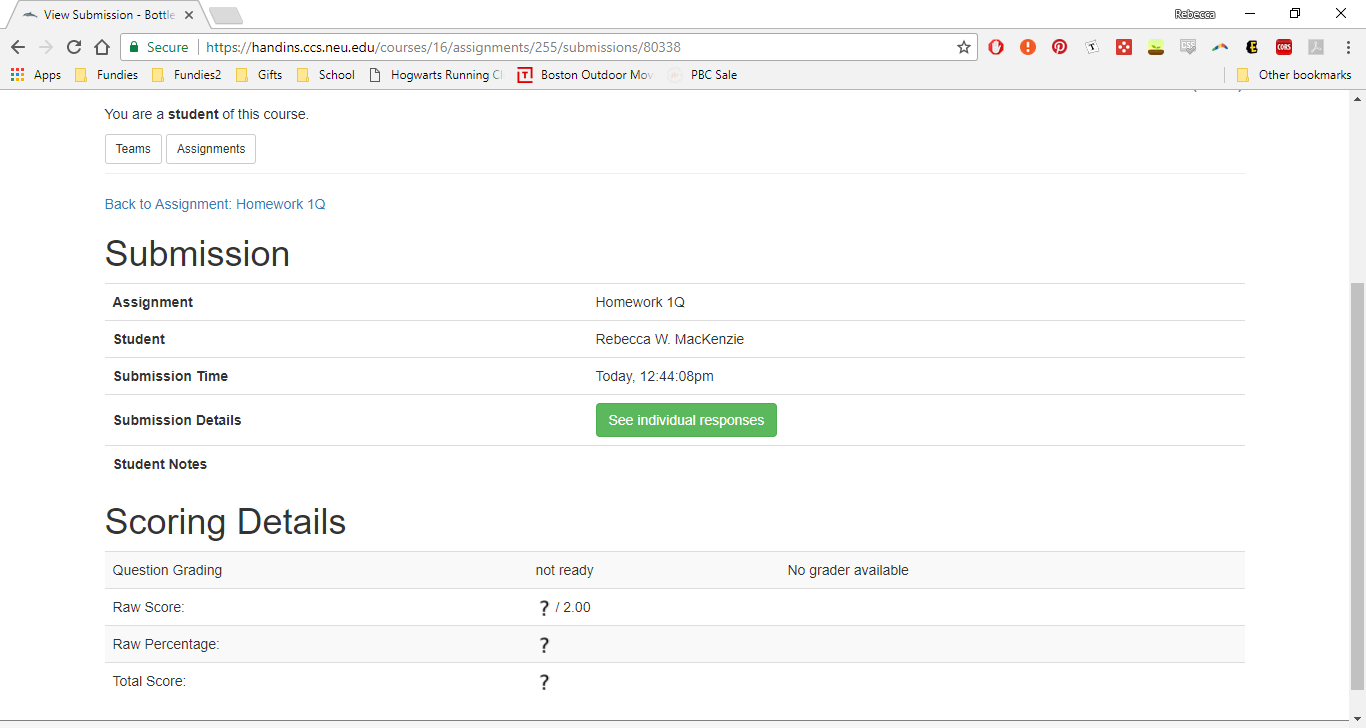
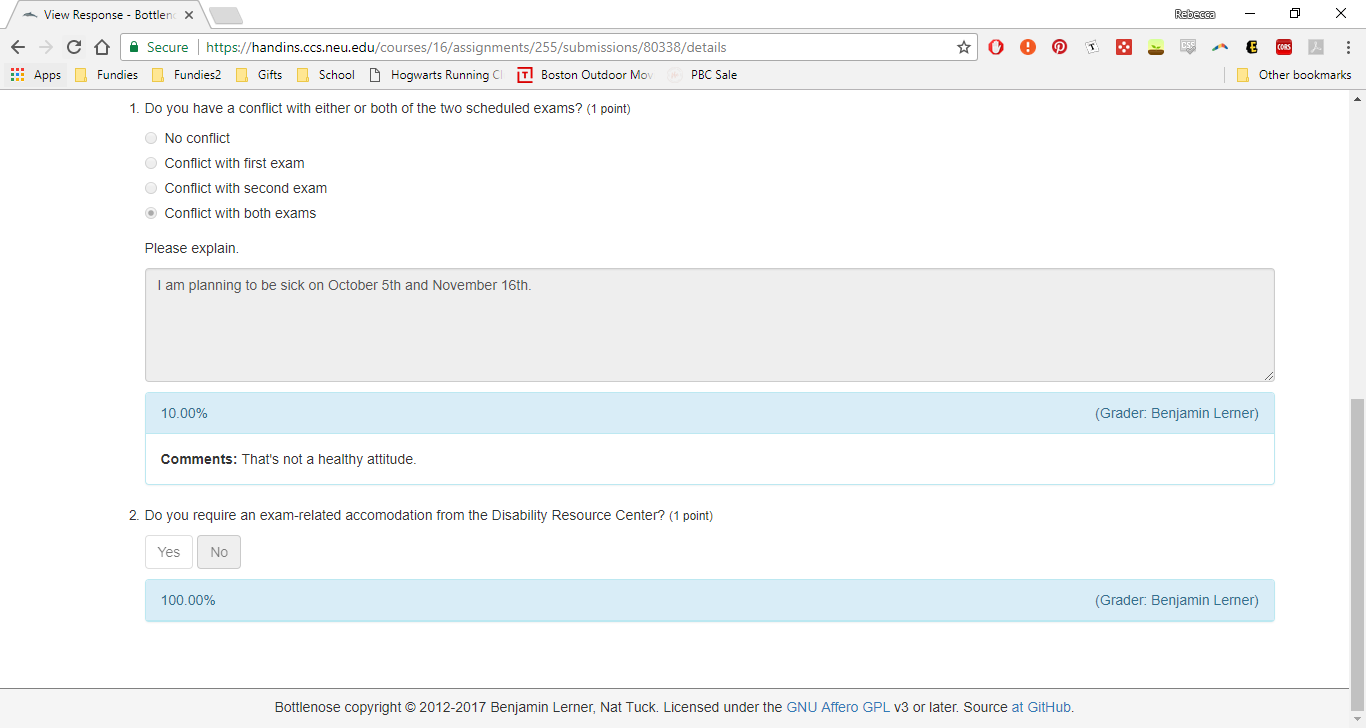
Notice that the grading shows up as “not ready”. This is because the course staff must go in and manually grade the questionnaires. When all the questionnaires are graded and the grades have been published you should see your score show up as in the below image. You can view the grader’s comments by clicking the blue “Grader output” button starred below:
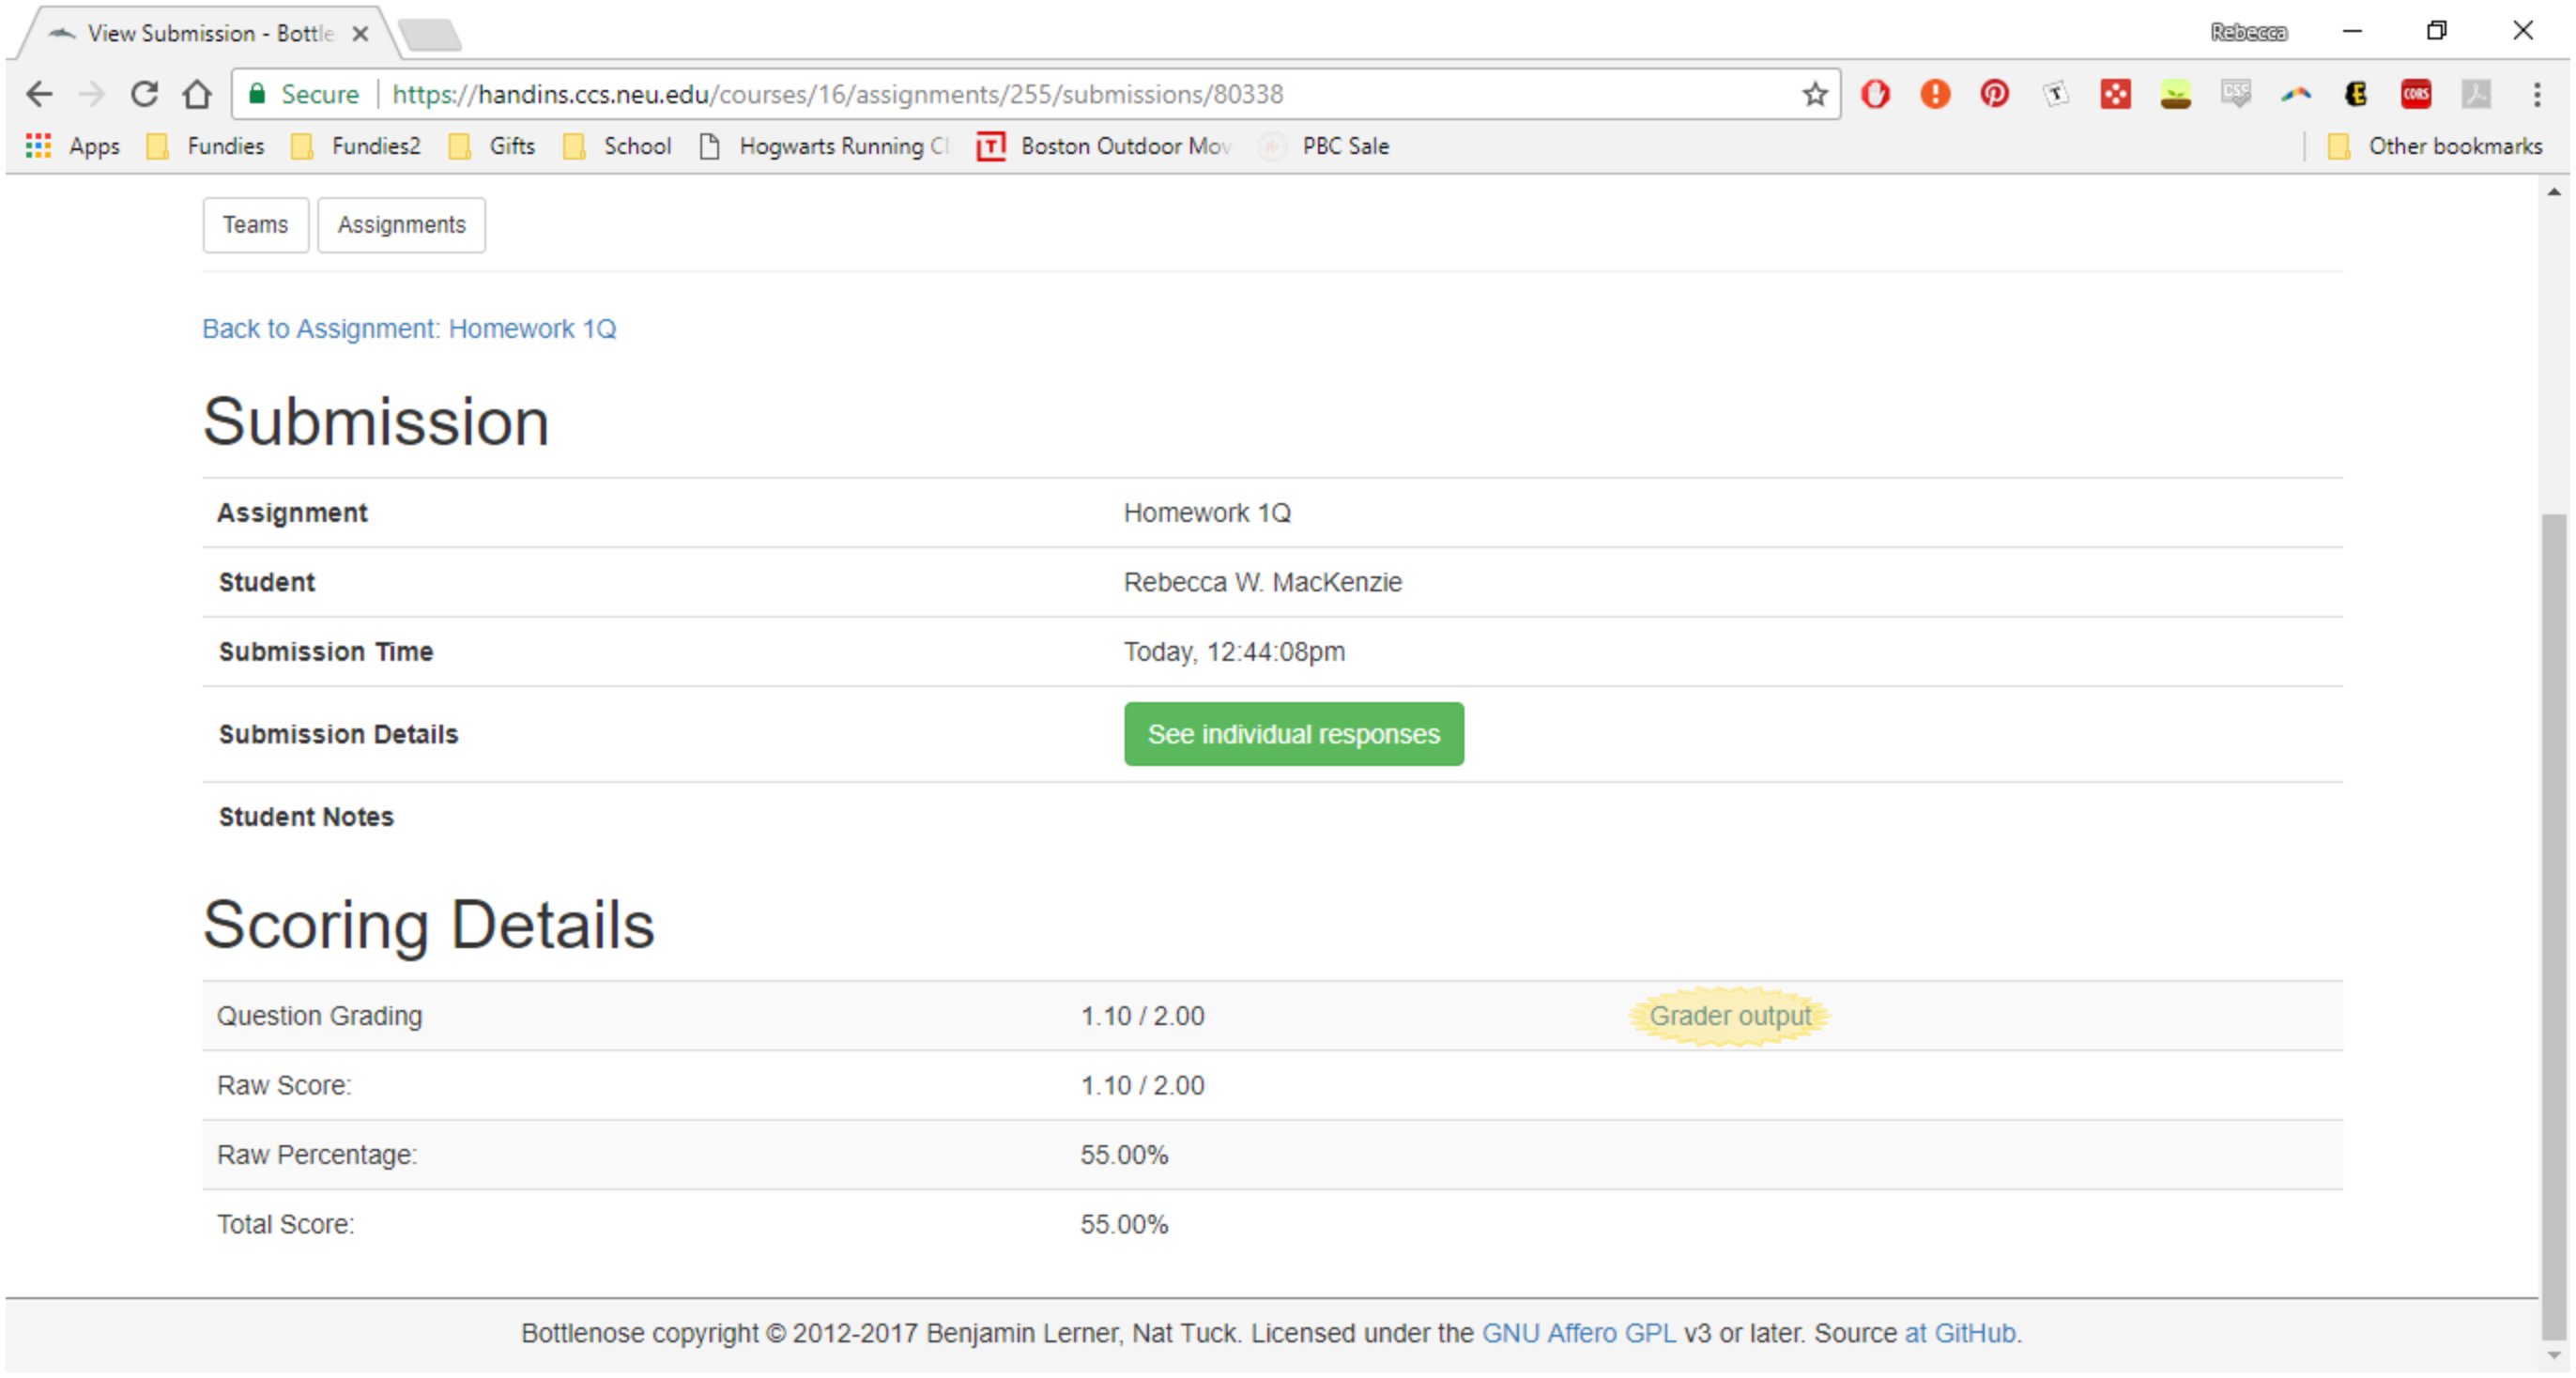
The grader output page will give you a score for each question you answered as well as comments from the instructors or course staff on how you could do better:
8 Submitting an assignment file
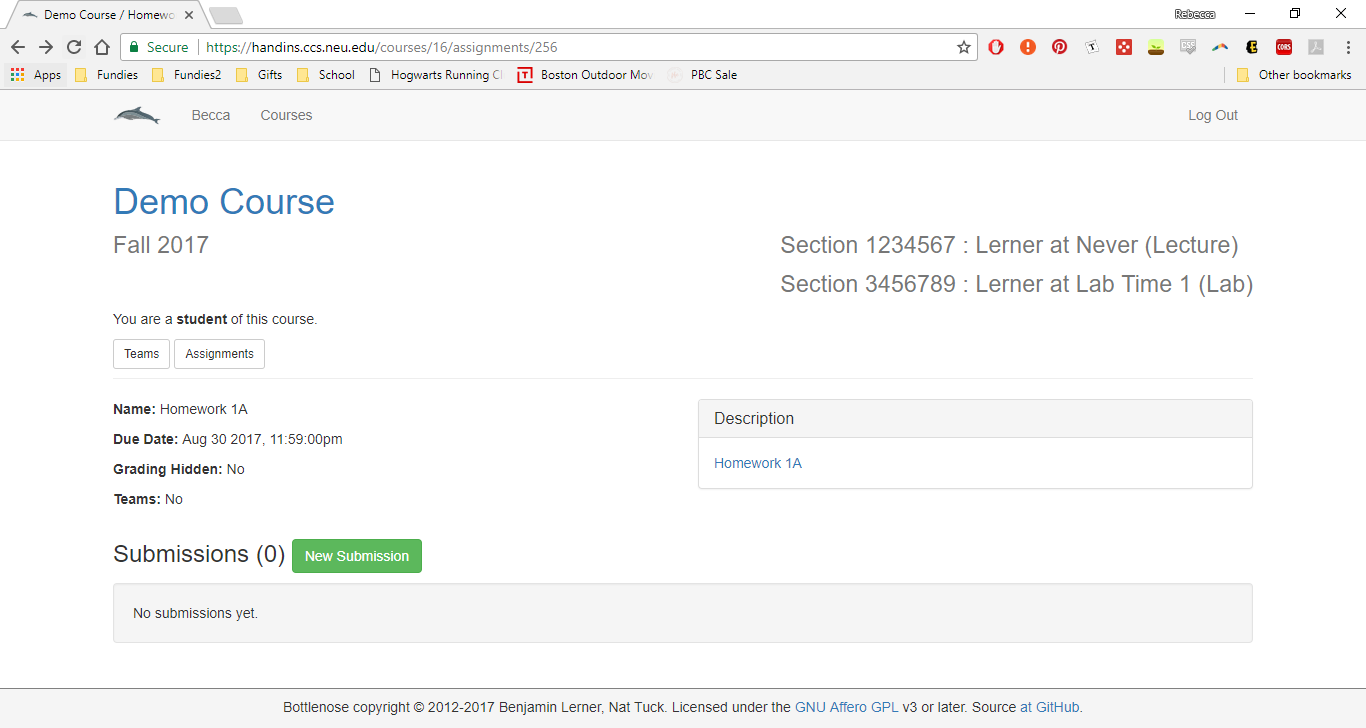
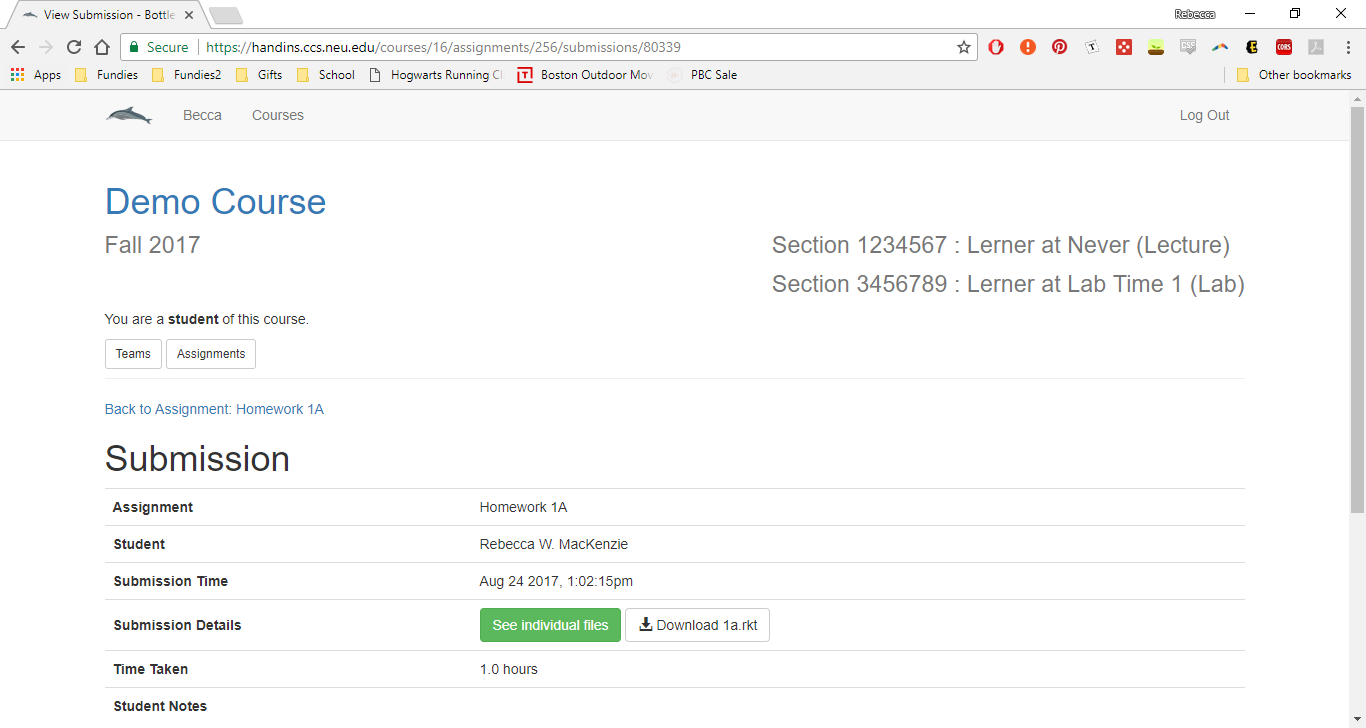
Go to the course home page (see Viewing a course’s home page). Click the blue link for the assignment you would like to submit to. In our case I will select Homework 1A.

Click the
 button to start a new submission.
You may be asked how many hours you spent on the assignment. Please be as accurate as possible since this information is useful for us when determining how hard the assignments were. You can also enter some notes about the assignment if you feel there is something the graders should know. Finally, click the “Choose File” button and select the file you would like to submit. If you would like to submit multiple files please put them all together in a .zip file before uploading to the handin server. Click the
 button at the bottom.

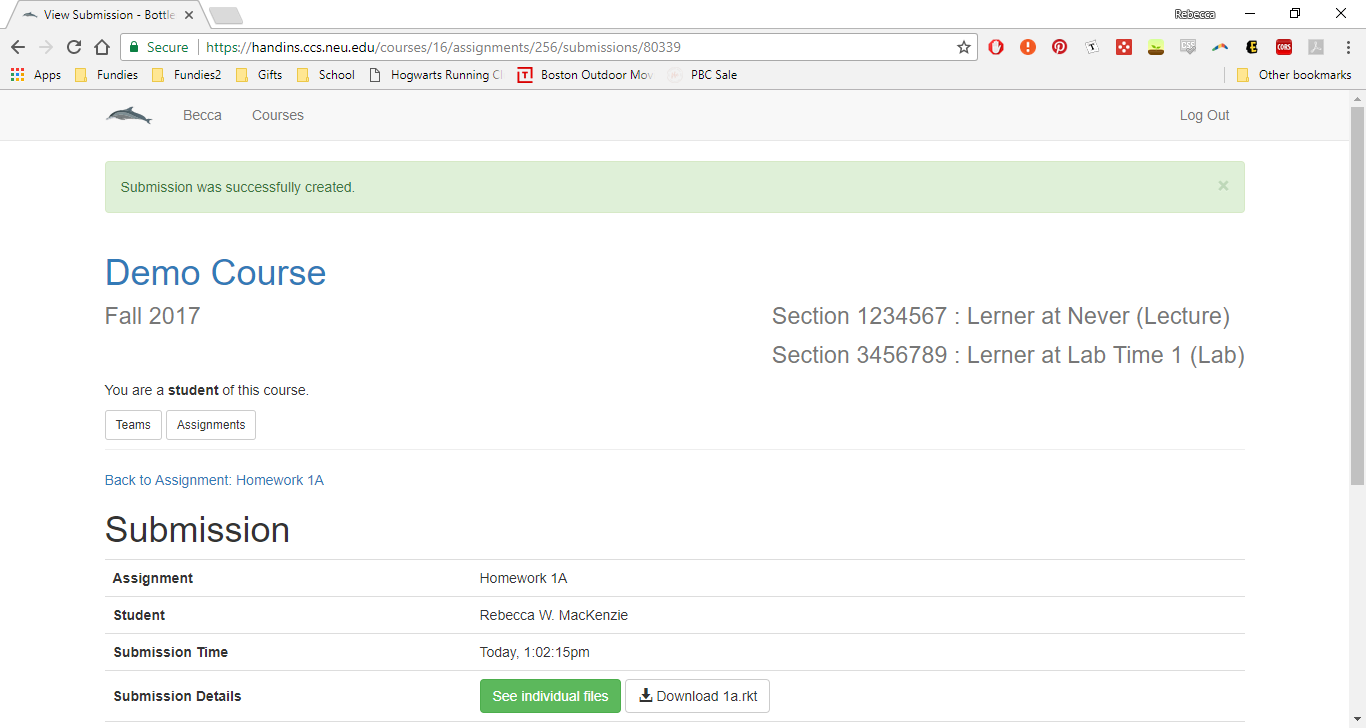
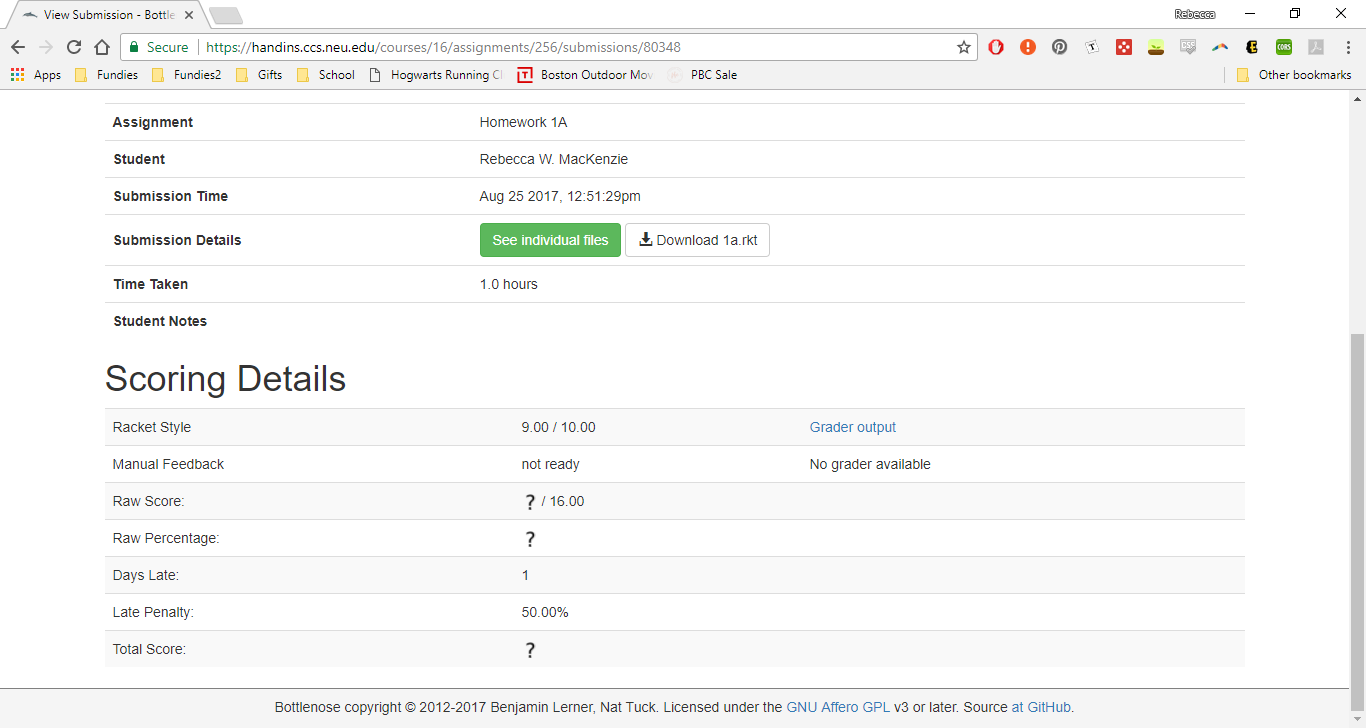
After submitting you will be taken to the page for that submission which should look something like the below image. Please note that the graders will say “not ready” initially since it can take some time for automatic graders to run and manual feedback will not be available until the course staff have a chance to look at your files.
There are two kinds of graders: style graders, which happen automatically, and manual graders which are how the course staff give you feedback on your assignments. After a minute or two your style grade should be available. Click refresh and you should see something like this at the bottom of the page:

If you do not receive a perfect style score you can click the blue “Grader output” link to see what you did wrong. Please fix your style issues and then re-submit before the deadline (see Resubmitting an assignment). The grader output screen looks something like this:
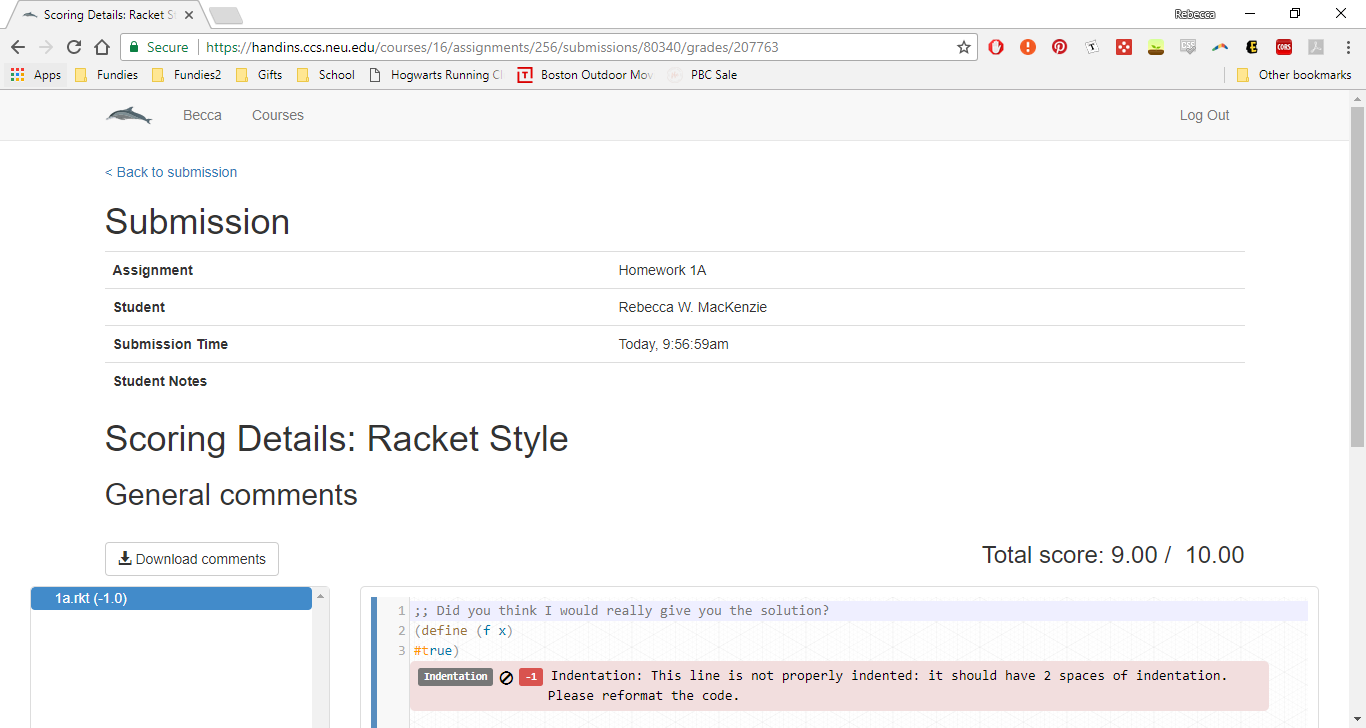
On the left it shows you all the files you submitted (I only submitted one file) and how many points were taken off from each file. On the right you can see the text of the file that is currently selected and any comments on why you got those points removed.
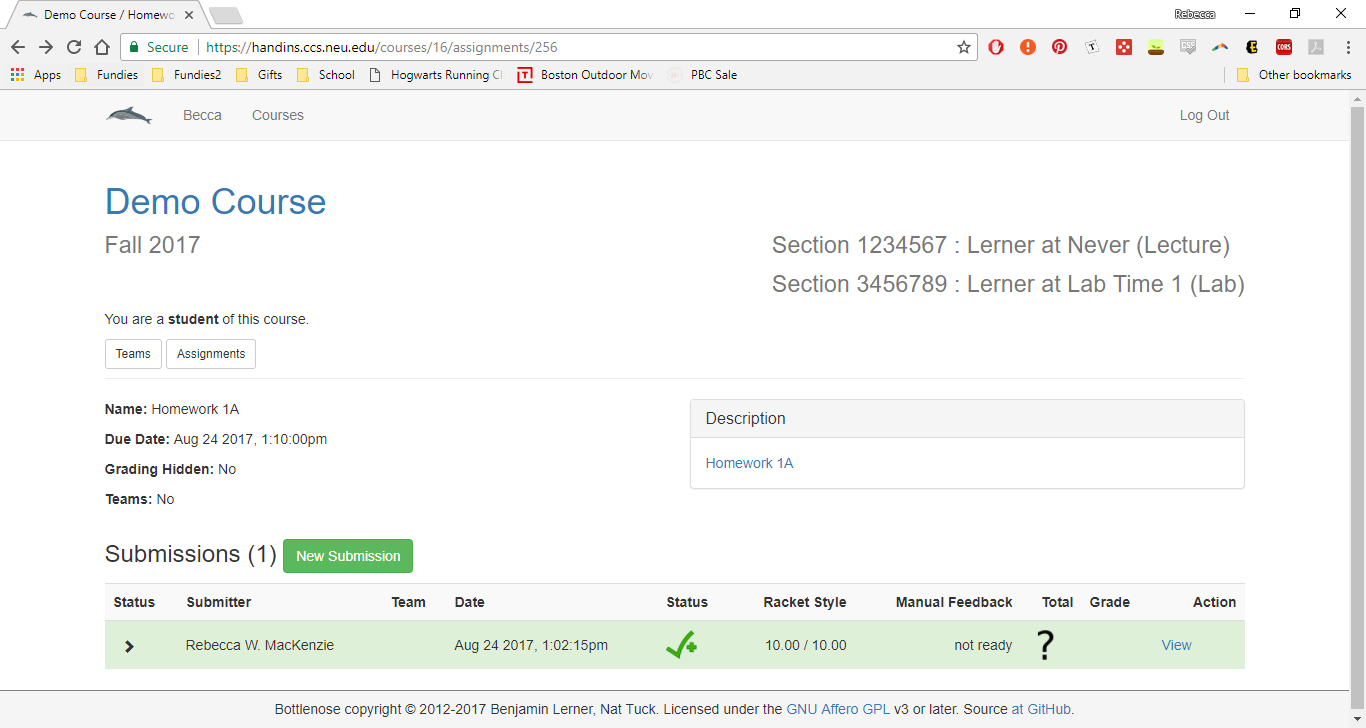
9 Resubmitting an assignment
If you are not happy with the score you received on the automated grading or you want to change something about your assignment you can resubmit. You can submit as many times as you want before the deadline and we will grade your most recent submission. From the submission page click the blue link that says “Back to assignment” or follow step 1 from Submitting an assignment file to get to the assignment page.
Click the
 button.
Fill in the information about your assignment. Try to be as accurate as possible when giving the time taken on the assignment. Select the file you would like to submit.
NOTE: If the deadline has passed but you are within the late-period defined by the course, you will still be able to submit. However, you should see a red warning as in the image below. Read the course policy on late submissions: since we grade your most recent submission, please be sure you want to incur a lateness penalty before submitting after the deadline!
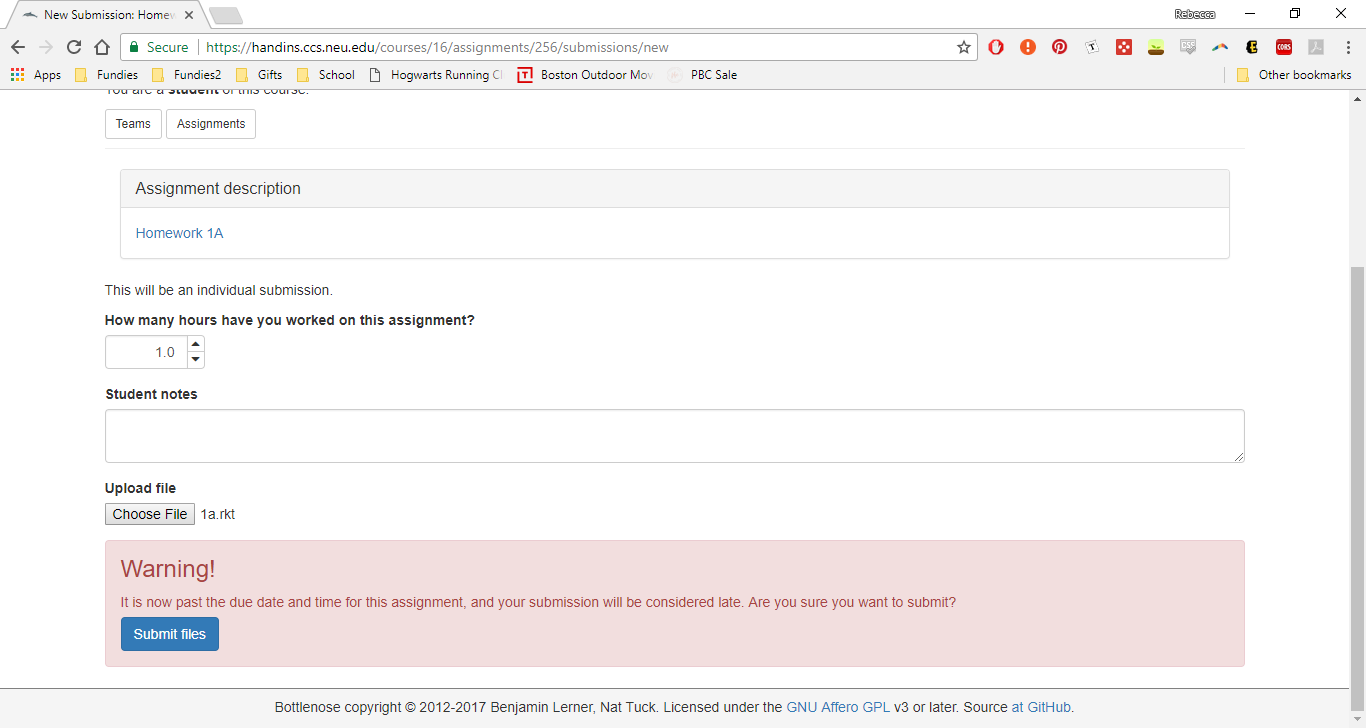
Click the
 button and you will be taken to the submission page which looks like the following:
10 Checking your grades for the course
Go to the course’s home page (see Viewing a course’s home page). Click the
 button.
At the top of the page you can see all the assignments for the course, the weight of those assignments, and your score on the assignments. You can see here that I have one graded assignment (Homework 1Q) on which I received a 55% and one ungraded assignment (Homework 1A).

At the bottom of the page you can see your overall statistics for the course. The minimum grade so far is the grade you will receive if you do no work and submit nothing for the rest of the semester. As you can see my current minimum grade is 0.55% because I have submitted an assignment worth 1% of my total grade on which I scored a 55%.

Your grade so far is the grades you have received so far divided by the total you could have received so far. Ungraded assignments and any assignments that aren’t yet due are not included in this calculation. This is our estimate as to how you are currently doing in the class, and can fluctuate wildly over the course of the semester (especially early on), but it will approach your final grade as the end of the semester approaches. As you can see I have a 55% currently because I have one graded assignment on which I scored 55/100.

Your maximum grade is the grade you will receive if you do perfectly on all future assignments, including ungraded assignments, assignments that do not yet exist, and any known extra credit assignments. My maximum grade is a 99.55%. The 99% comes from the fact that only one assignment worth 1% of my grade has been graded so far. That one assignment got me the 0.55%. Your maximum grade should only ever decrease, unless extra-credit assignments are posted.

The homeworks not yet submitted lists the points you could get on assignments that are available but that you have not yet submitted. In this example I have submitted all my assignments, I currently have a 0 there. If homework 1A were not yet due, but I had not submitted it yet, this would show 1 point because homework 1A is worth 1% of my grade. If I never submit to homework 1A, and the deadline passes, then this section would again drop to zero points.

The homeworks not yet graded lists the points you could get on assignments you have submitted that have not yet been graded (or the grades have not yet been published). Right now homework 1A has not yet been graded and it is worth 1% of my grade so I have 1 point in this category.

The future assignments lists the points you could get on assignments that do not yet exist. It is assumed that all assignment weights for a course will add up to 100% so right now we are assuming that there will be 98 more points of homeworks to submit in the future.

Please note that if you ever forget what these scores mean you can click the black question marks on the right hand side to see the descriptions.